
In this tutorial you will learn about Level of Detail, why it is important and how you can use Model Lab to produce LODs.
- Open Model Lab and import the Fika chair (basic).cmsym model.
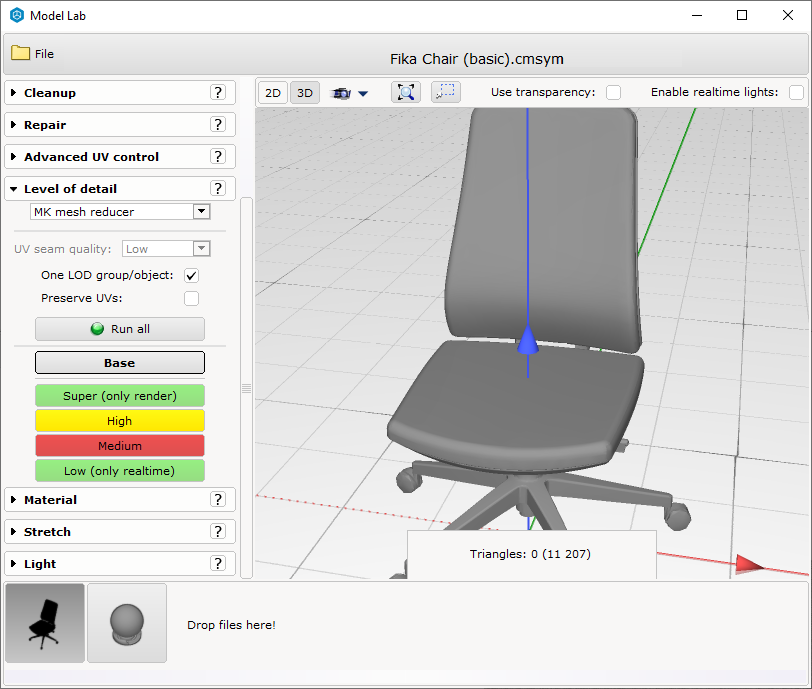
- Expand the Level of detail dropdown menu.
- In this dropdown you can perform mesh reduction in order to increase performance, or to be more concrete; reduce the time needed for rendering and memory consumption.
- First, choose which mesh reduction solution to use.
We provide three solutions: MK mesh reducer, Oak mesh reducer, and SeamAware mesh reducer.- The MK, which is the default solution, is faster than Oak and usually, MK produces a nice result.
- The SeamAware mesh reducer can preserve texture seams and object boundaries better but is slower than the other mesh reducers.
- When SeamAware mesh reducer is selected, another choice is available, UV seam quality. This controls how important preservation of texture seams is. Higher setting means potentially sacrificing more details in other areas to preserve texture seams better.
- If you are unhappy with the result, you can go ahead and switch to Oak or SeamAware.
- Once you have selected the mesh reduction solution, click Run all. This will automatically create the different LODs (super, high medium, and low) with a triangle count based on the surface area of the model. Models with a larger surface areas will be given a higher triangle count compared to models with a small area.
When the models are within the triangle count, the LOD buttons are marked green.
If it's yellow, it's still an acceptable triangle count, but may have impact in performance. It's not advisable to leave it at yellow unless it's a model used rarely.
But if it's red, it will strongly affect the total performance of the drawing! Be sure to lower the triangle counts! - Once the automatic reduction is finished you should review the result. You can do this by clicking on the LOD you would like to review.
This will show the LOD in the 3D-view. It will also automatically position the camera so that the LOD is covers the correct number of pixels on the screen.
- If you are unhappy with the automatic result, you may select a specific node and increase the number of triangles for that node by dragging the slider or by inputting a requested number of triangles.
In the input field, you will see the number of triangles for the selected nodes. Use Ctrl+A to select all nodes and view the total triangle count for the selected LOD. You can use Ctrl+D to deselect all nodes again.
In order to get even better performance, you should try to decrease the triangle count manually even further than what the automatic solution suggested.
If you increase the number of triangles for a specific node, it is good if you try to decrease the number of polygons for another node – “stay green”. Keep in mind that a drawing may contain thousands of products and in order to provide a great user experience we need you to respect the triangles limits. Always try to have all LODs marked as green.
Once you are happy with a LOD you can move to the next LOD by using the up/down arrow keys.
That’s it! Now you should know:
- What Level of detail is and why it is needed.
- What a LOD is.
- How you can automatically create LODs in Model Lab
- How you can manually adjust the LODs by selecting specific nodes and adjust the triangle count for these LODs.
Comments
3 comments
Is there a way to keep the camera locked at a set zoom when switching between models and render levels?
Hi Vincent,
There is no way to keep the camera locked when switching between models.
But, there is a way to keep the camera locked when switching between render levels.
To do this, click on File found on the top left of Model Lab, then select Settings from the dropdown.
A new window called Model Lab settings should now open, at the left side of the window, click on Behavior.
On the right side of the window, you should a tickbox for the option Adjust zoom on LOD switch. Disable this option to fix the camera change when switching between render levels.
Hi Yewsiing,
Great, I believe this has also made it so that the zoom does not change between models which is what I was looking for. Thank you so much.
Please sign in to leave a comment.