
Have you ever wished you could just pick up the properties and finishes from one area of your drawing and apply them to another? Well guess what - you can! The Scheme Painter allows you to select objects in your drawing and use their properties to apply either across your entire drawing or to another selection. You can use the Scheme Painter on any size selection and include products from multiple manufacturers at once, and even your walls.
And guess what else you can do! Any guesses? None? Ok, I'll tell you. You can create a Scheme directly from objects in your drawing. So let's say you have received a drawing from a coworker who has applied finishes but has not shared their Scheme file with you. Have no fear, the Scheme Painter is here!
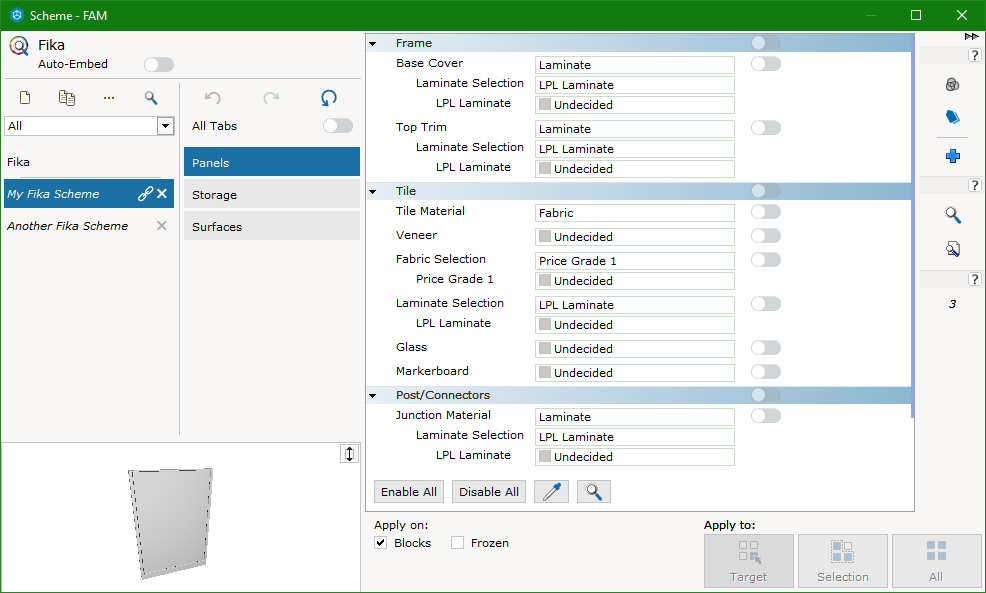
If the Schemes in your Extension do not look like this, you won't be able to use the Scheme Painter for products, though you can still use it for walls.
Let's look at a scenario where the Scheme Painter can save you a lot of time. You have a drawing that has different Scheme options in different areas, but you do not actually have a Scheme saved. Maybe you applied properties to individual objects, or maybe you originally used a scheme but didn't save it. Whatever the case may be, you want to be able to use the properties in one area of your drawing and apply them in another.
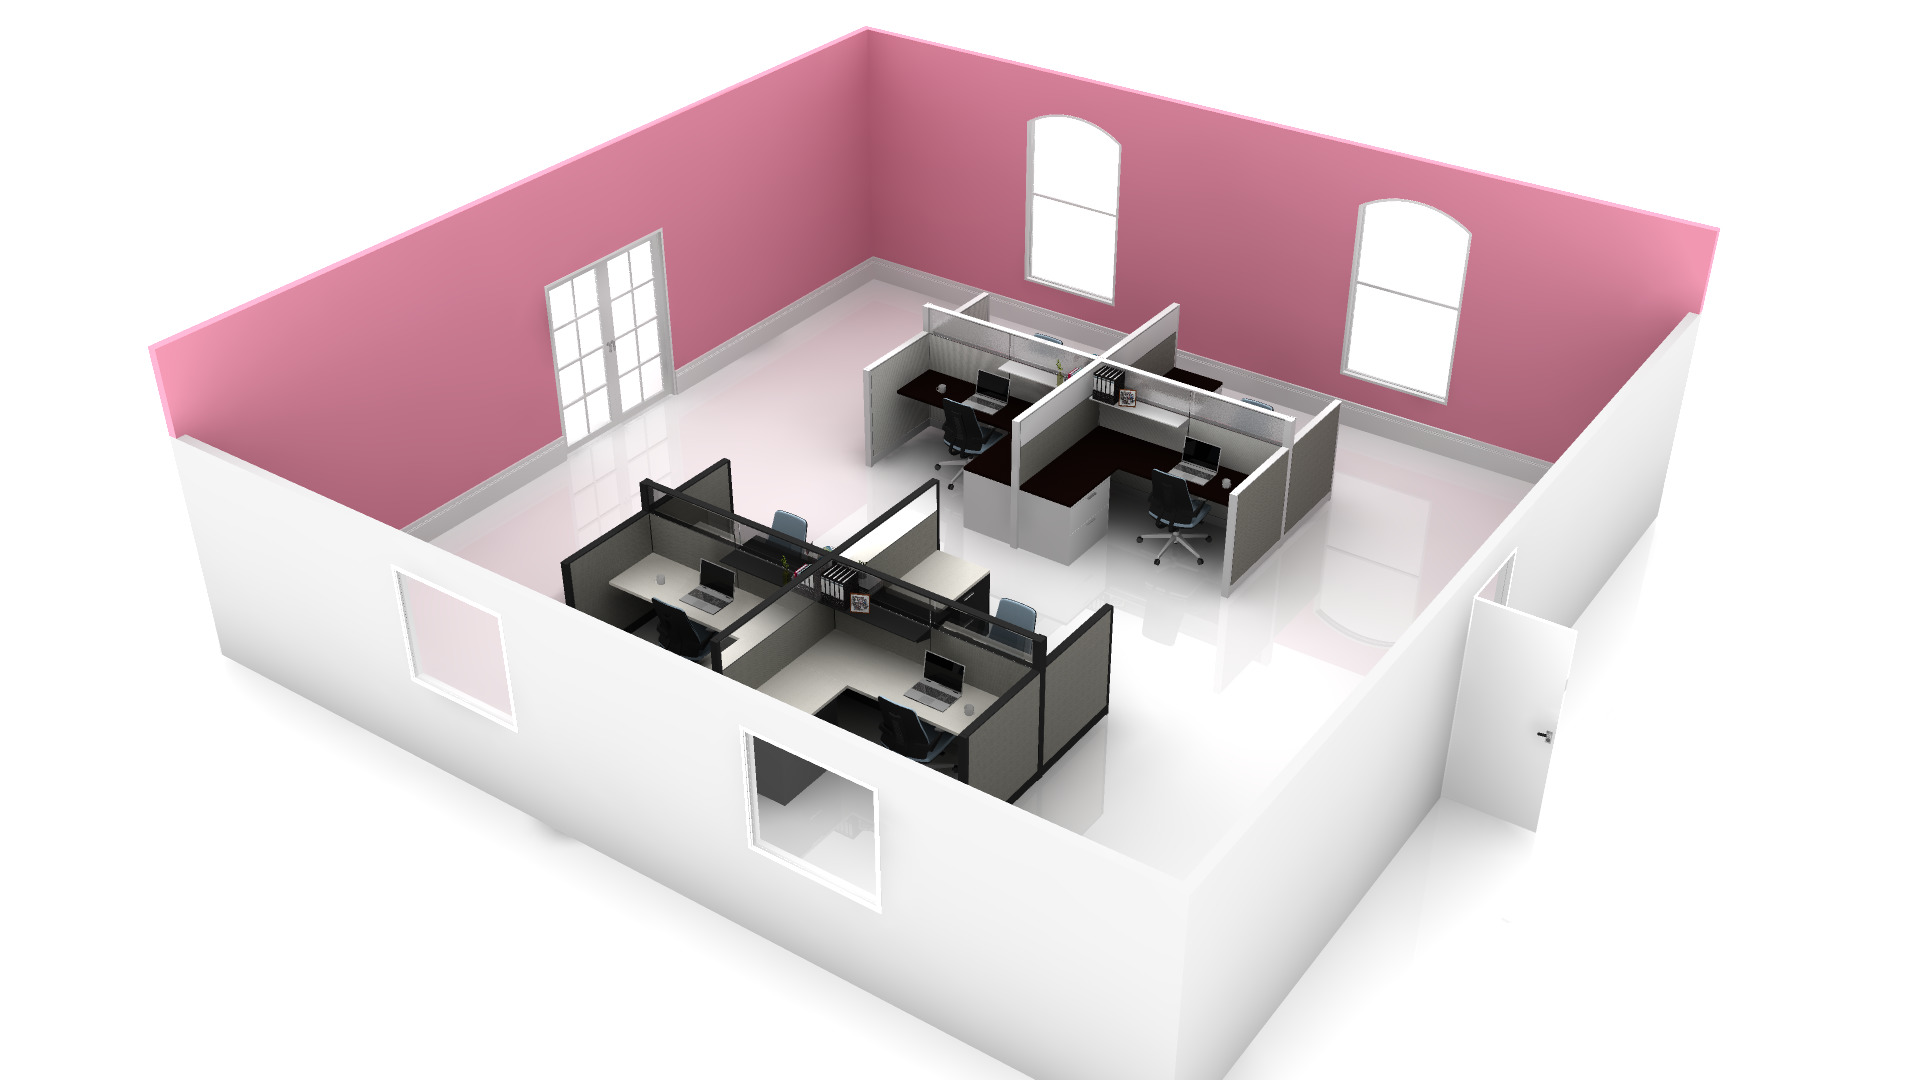
In this case, you have a stunning design where some of your products have the final finishes and properties you need to use. Half of your walls, doors, and windows have the correct height, style, base trim, and color. (How about that Baker-Miller Pink! If you're a color nerd like me, check out its fascinating history!) And half of your products have the finishes you want applied universally.
You can go about using the Scheme Painter in two ways:
- Pick up the options from one area and paint them on another
- Pick up the options from one area and create a Scheme to save or apply
Plus, there are a lot of other cool features!
Paint Scheme on another area
Here are the steps to use the Scheme Painter to apply finishes from one area to another:
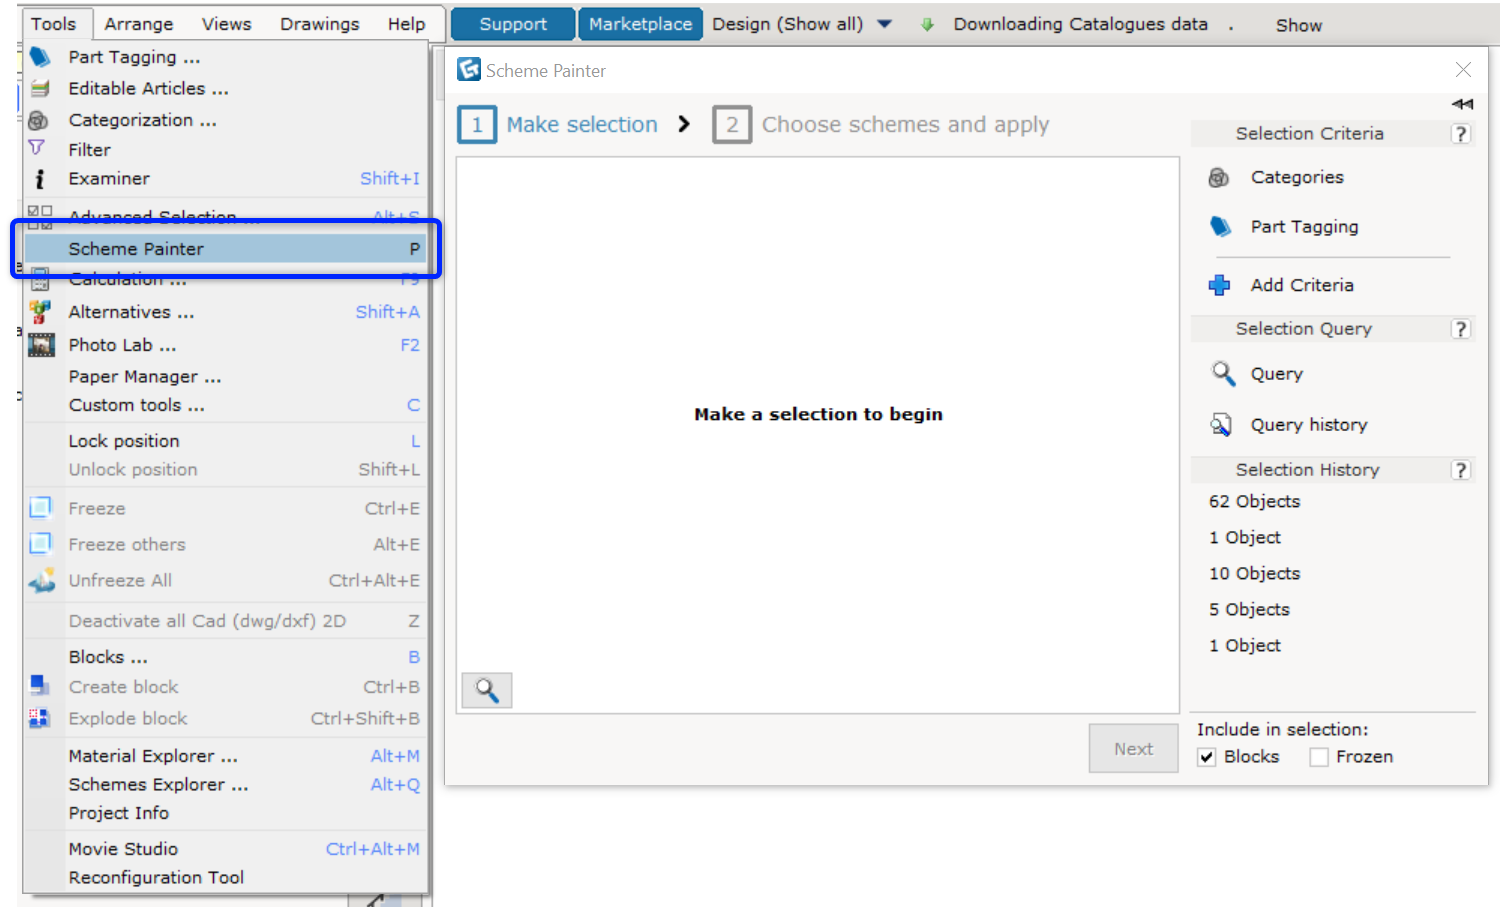
- Open the Scheme Painter from the Tools drop-down menu, from the top of the Scheme Explorer, or by pressing P on your keyboard.
- Make a selection in the drawing.
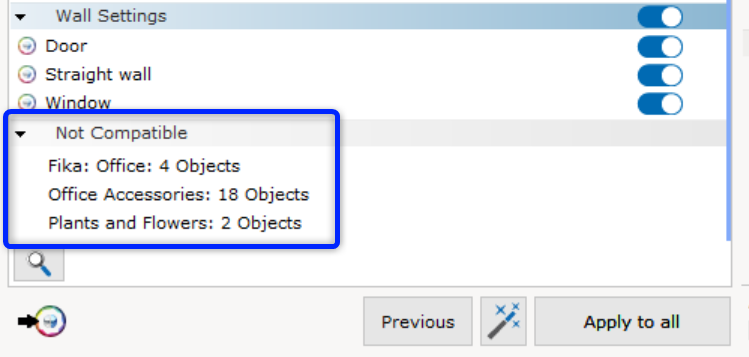
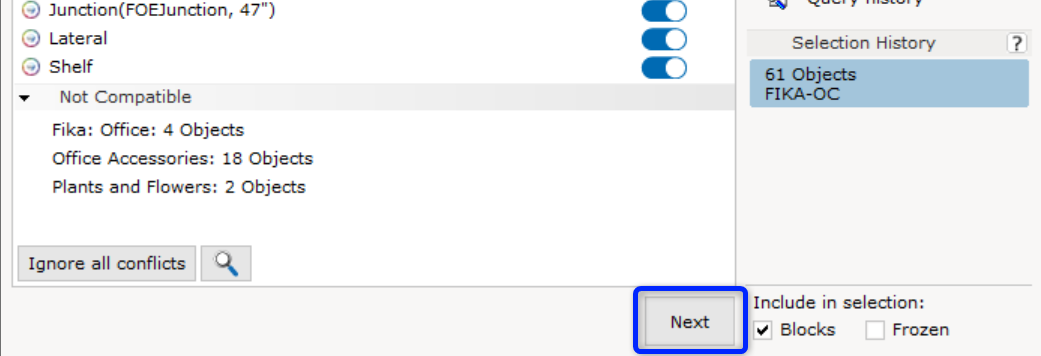
Use the Advanced Selection Tool that is attached to the right of the dialog to make a precise selection, or just select directly in your drawing. - You may have some objects in your selection that are not compatible, in which case you will see them at the bottom of the list.
- Once you are happy with your selection, you are ready to move on to the next step: the Apply phase. This part is easy. Just click Next.
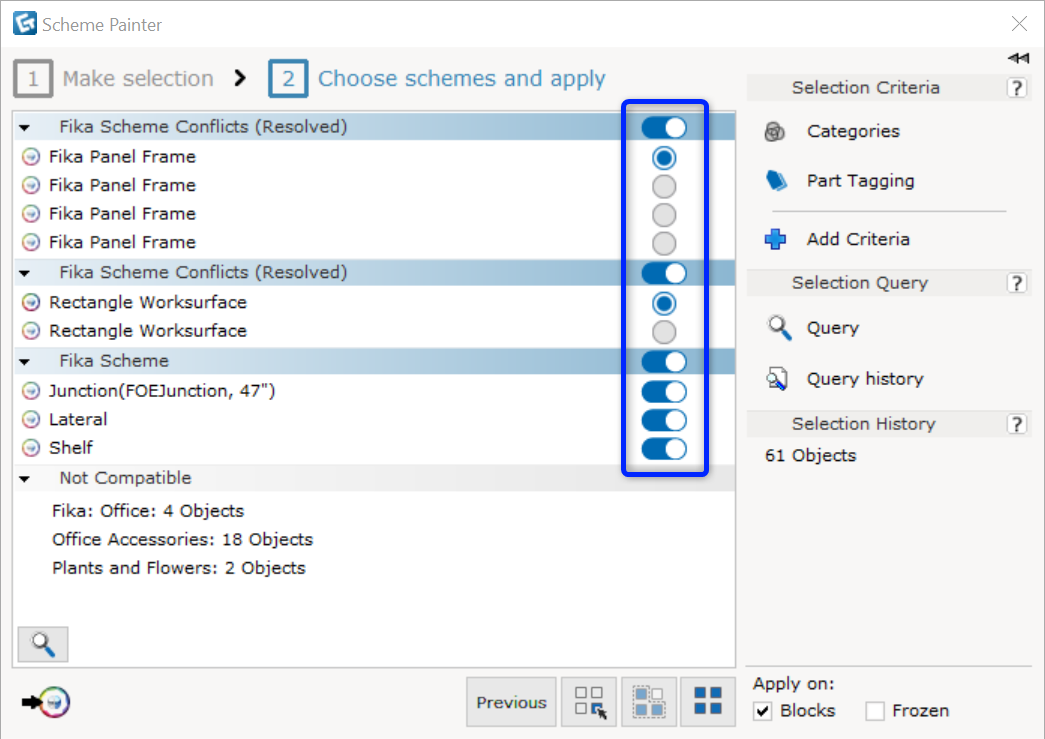
- You'll notice at the top that the tool has progressed you to the Choose Schemes and apply step:

As soon as you toggle a switch off or resolve a conflict, you are sent into phase two. - Also at this stage, you will need to resolve all conflicts before applying.
- When you are in this phase, your selection from phase one is locked. You can now decide which objects from the original selection have properties you want to recycle. By default, all valid options are toggled on, but you can left-click a toggle to switch it off.
- While in phase two, Choose Schemes and Apply, you can select objects in your drawing to apply the options to. Either select objects directly in your drawing, or use the Advanced Selection Tool for more control in large drawings. If you're still in phase one, Make Selection, it will simply change what objects are selected in the drawing, which will totally change the options you can toggle, so make sure that you're in phase two before you start making new selections!
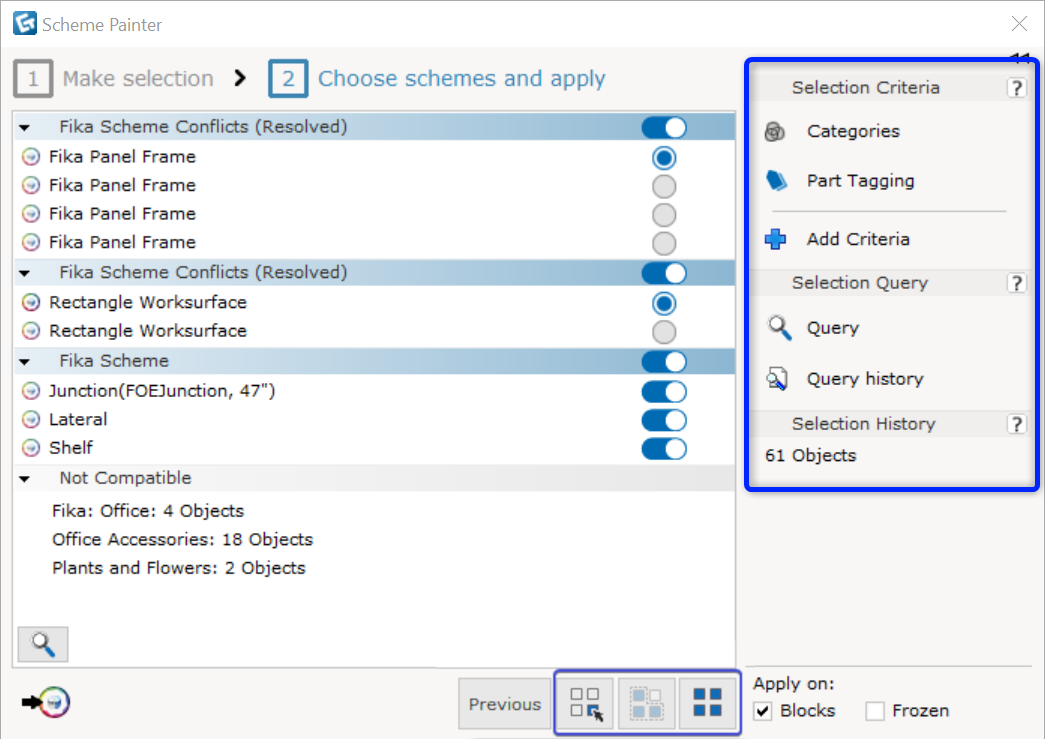
Apply to All is active when you have no selection in your drawing; it will switch to Apply to selection once you have selected something. You can also use the Wand tool to choose what to apply your Schemes to! Learn more about the Wand tool (and applying Schemes in general) here. - If you want to go back to phase one and select a new source, just click Previous and you will be able to make a new selection.
Create a Scheme from options in a drawing
If you want to create a Scheme directly from objects in your drawing, follow these steps:
- Follow steps 1-7 from the above section until you are in phase two: Choose and apply Schemes.
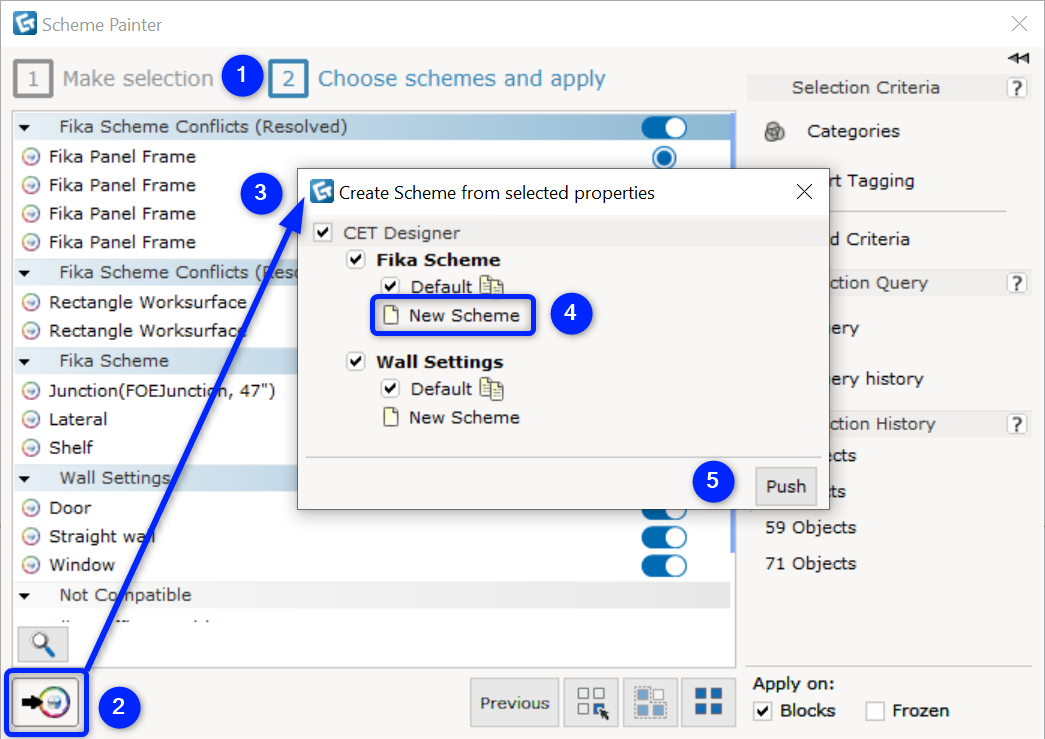
- After you have made your selection and resolved your conflicts, click the Create Scheme from selected properties button.
- This prompts a small window to open that requires you to choose which Schemes you want created. If you have objects from multiple tabs, like walls and Fika in this example, both Extensions will be listed here.
- Make sure all Schemes that you want to send the properties to are checked. If you do not already have an extra Scheme created, click New Scheme.
- Click Push which sends all of the properties to their respective Schemes. Open the Scheme Manager either from a component tab or from the Scheme Explorer where you can rename and save your brand new Schemes.
Other highlights
Resolving conflicts
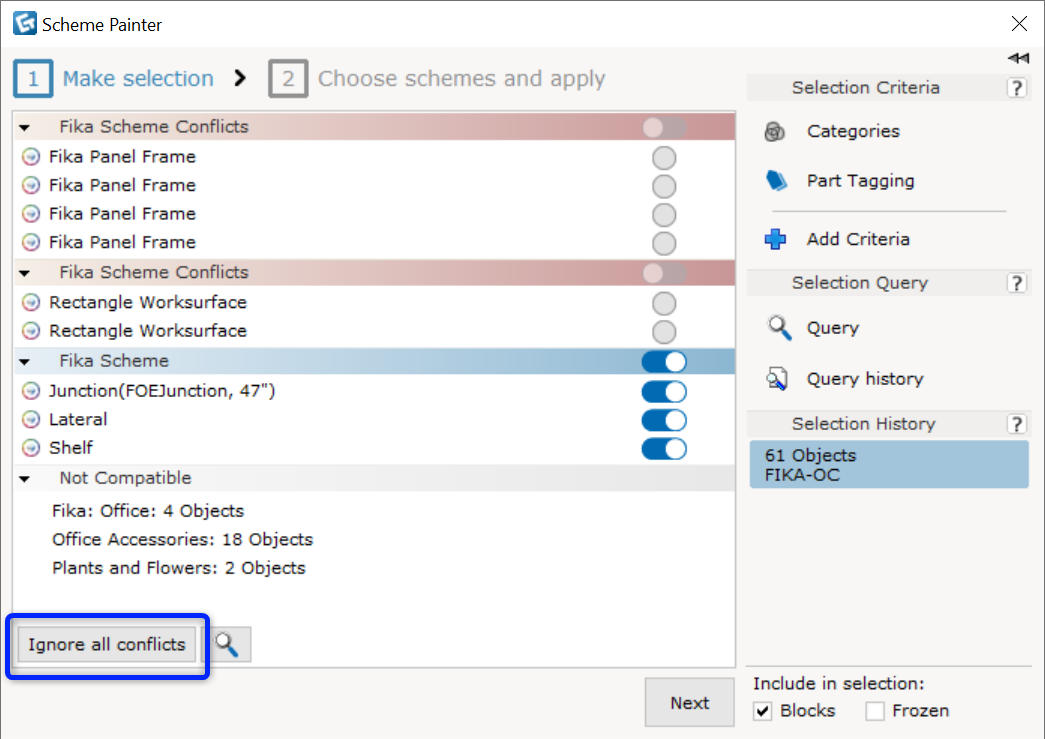
You may end up having some conflicts if you have selected the same type of objects with different options. For example, in this scenario, you have multiple panels with different fabric patterns - some white, some grey. You'll see a red header noting that you have a conflict, and you are required to make a decision regarding all conflicts before you can apply.
You have two options for resolving conflicts: either click one of the radio buttons to pick an object and its properties, or choose the toggle on the header line to denote that you don't want to include any of these options when you apply.
One option is to click Ignore all conflicts to resolve every conflict at once. This will assume that you chose none of the options for every product with a conflict.
Highlight objects
Hover over the name of an object to see it highlighted in the drawing: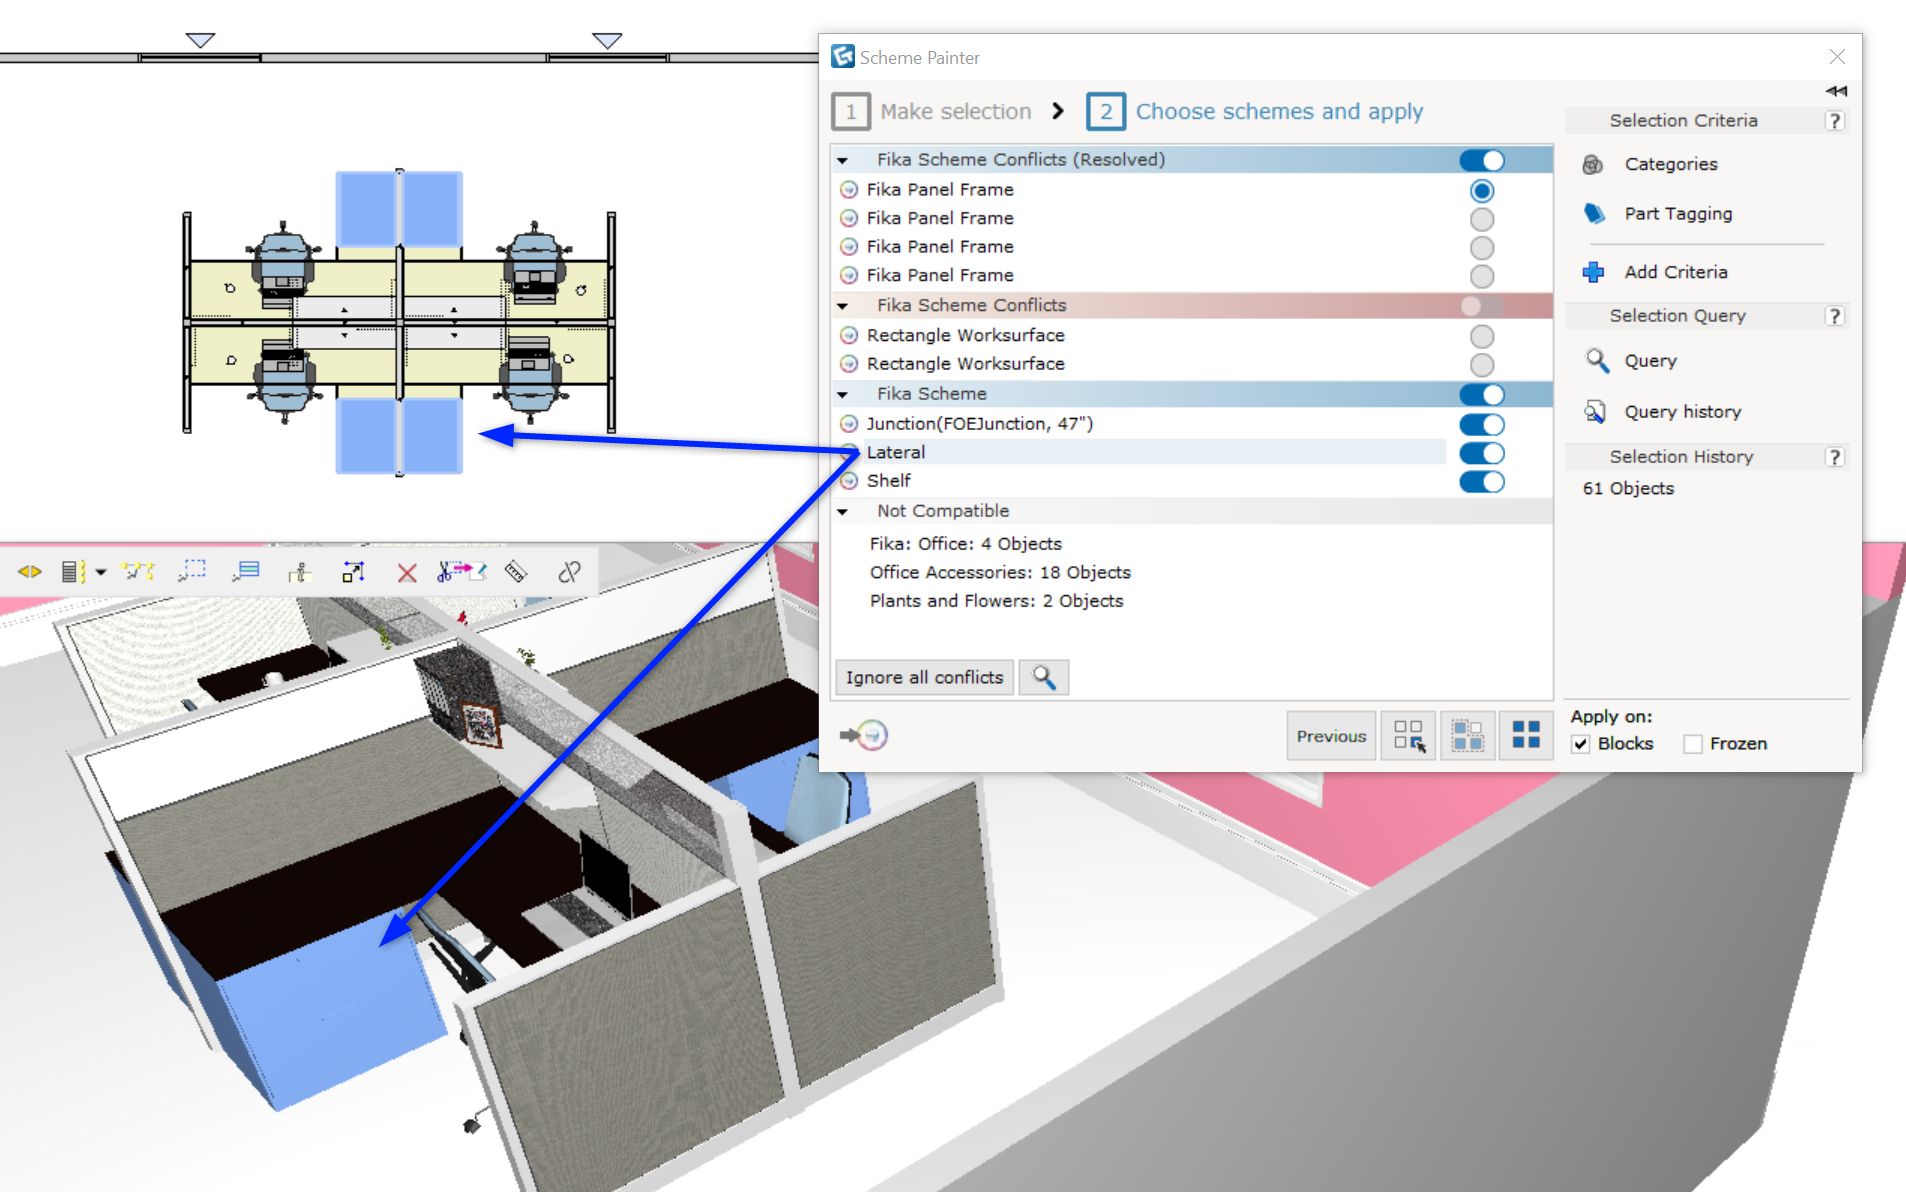
See details
To see more details about which products or objects have which properties, click the Scheme icon to the left of the object's name. This opens a window showing the properties for the object and you can even edit the options from here. Click click the "..." to change the options.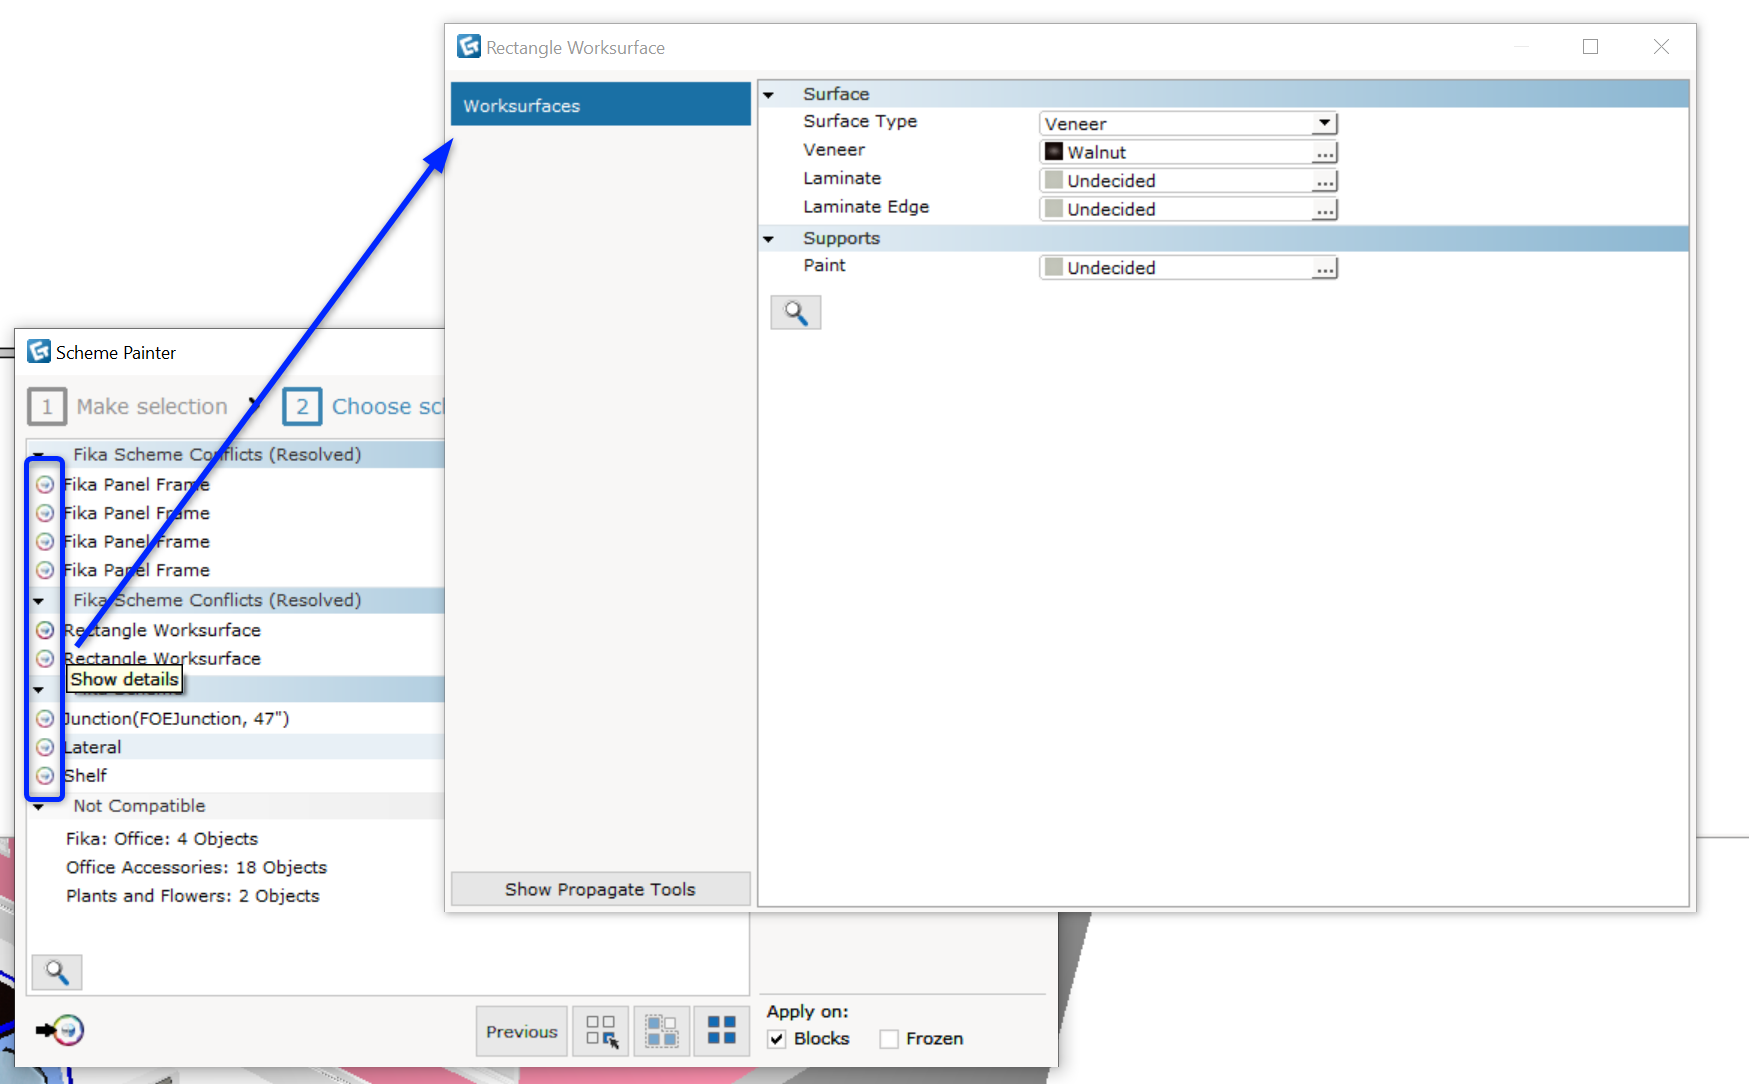
Comments
0 comments
Please sign in to leave a comment.