
Welcome to the 12.5 QA Testing Guide, please check with your developer to make sure 12.5 Migration is successfully completed before testing.
The guide now consist of 2 different sections, testing guide updates that are covered during the migration workshop from (27 Sept to 18 Oct) and the regular testing guide that was written amidst developer migration.
Migration Workshop Testing Coverage
2D View Clip
There is an issue with 2D view clip properties being overlapped, duplicated when users enter/exit 'Edit View clip mode' repeatedly. With this issue now fixed, it's important to make sure view clip should live up to its purpose. Follow test instructions below:
Test instructions:
In Paper view, clip an area of your snappers in the drawing, proceed to ‘Edit View’ and make sure:
- In ‘Zoom’ resize mode, stretch expand/shrink the view clip should only clip the correct coverage of your drawing’s content.
- Repeating the entry/exit ‘Edit View’ process will not result in overlapping/duplicating property boxes.
Core Properties
Developers had renamed all the core properties classes. This was done to provide more structured coding and consistent naming. Due to this all method/function parameter in core classes has also been renamed for consistency purposes.
Test instructions:
- Using your manufacturer extension, run through the quick and animation properties. Ensure that there are no missing options, and they can apply to your snappers.
Physical lights
Physical lights was introduced in CET 12.0. This time developer has decided to keep some physical light conversion functions in code to allow for a smoother transition to physical light.

Test Instructions:
- Using your manufacturer’s light extension, check that the lights are showing correctly if they are converted to physical lights.
- Check by enabling real time light and rendering.
Regular Testing Focus Areas
cm.abstract.office
The abstract office seen some changes as a result of code refactoring to improve its code efficiency. We recommend smoke test instructions to ensure the behavior stays consistent.
- Using your manufacturer extension, attempt snapping worksurfaces. The snapping behavior should be consistent and ensure the animation properties still shown and work as before.
- With your manufacturer office extension, verify that there are no missing properties, and can be toggled through and apply during the animation. After placement, again verify the quick properties and ensure there are no unintended changes. Also, test changing the dimensions (length, width, height) of the snapper if applicable.
cm.core.category
A routine code maintenance as part of the 12.5 release has been done to the 'category' classes in codes. There are no new features nor changes introduced. Hence, please follow these test instructions to ensure categories still works fine for your manufacturer extension.
- In category dialog, ensure the default categories are still retained if your manufacturer does have any. Check that assignment of categories to your product snappers still work as before, with undo and redo.
- Check if default manufacturer view modes (if your manufacturer has any) still works by showing only the relevant categories of snappers in the drawing space.
cm.core.partTag
Developers did some code refactoring to the 'partTag' classes in CET 12.5. In regard to this, there are also some internal development work done that inflicted some code changes in this area. Note that there are no new features nor changes introduced. Thus, please follow these test instructions to ensure part tagging still works fine for your manufacturer extension.
- Using your manufacturer extension, part tag your product snappers through all methods (rectangle, custom shape, selection, etc.). Do check if default part tag categories are still retained if your manufacturer does have any, also not to forget verifying if undo and redo works.
- Test visibility of part tags through view modes, filter, view clips and print outs.
cm.core.propsScheme
Concerning code maintainability, developers refactored codes relevant to 'propsScheme', specifically, many unused classes were removed.
Ensuring the best experience possible in CET 12.5, we recommend smoke test instructions of:
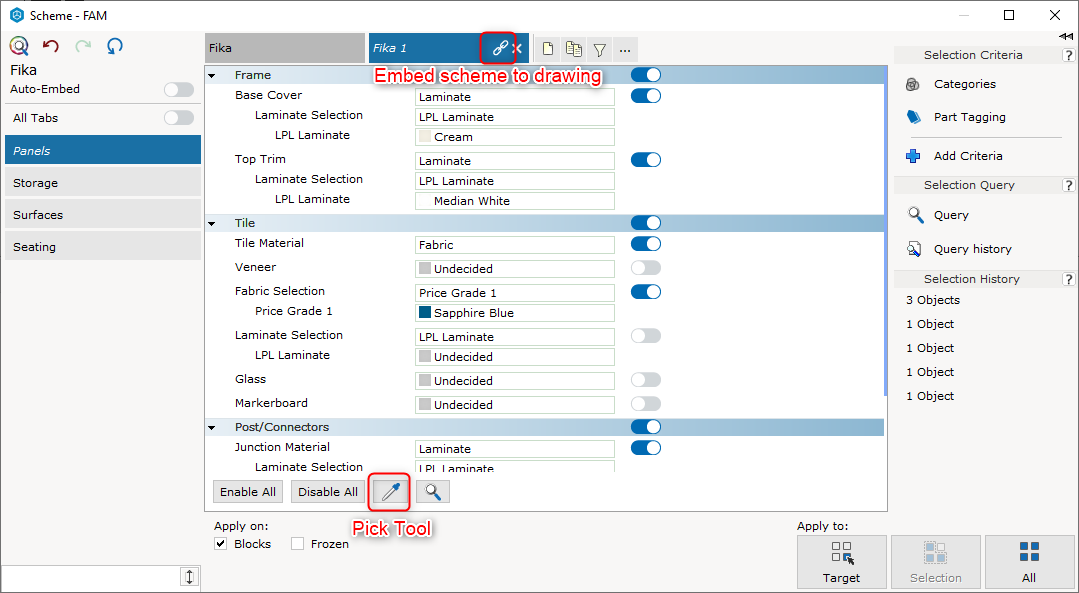
- Using your manufacturer extension, open Scheme manager, and run through all possible features and materials. Look out for any adverse effects and make sure it is working as usual.
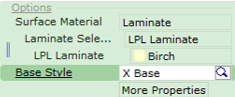
- Try out the 'Pick' tool and make sure it can pick up scheme properties and autofill an empty scheme.
- Try embedding schemes to your drawing, then save and load your drawing, making sure the scheme is embedded and not be missing. For more information on 'Embedding Schemes', refer to 12.0 QA Testing Guide.
cm.core.spaceVolume
In CET 12.5, developers refactored codes in core for caching purposes every time that a snapper in drawing space is added or removed.
Ensuring no adverse impacts, test by:
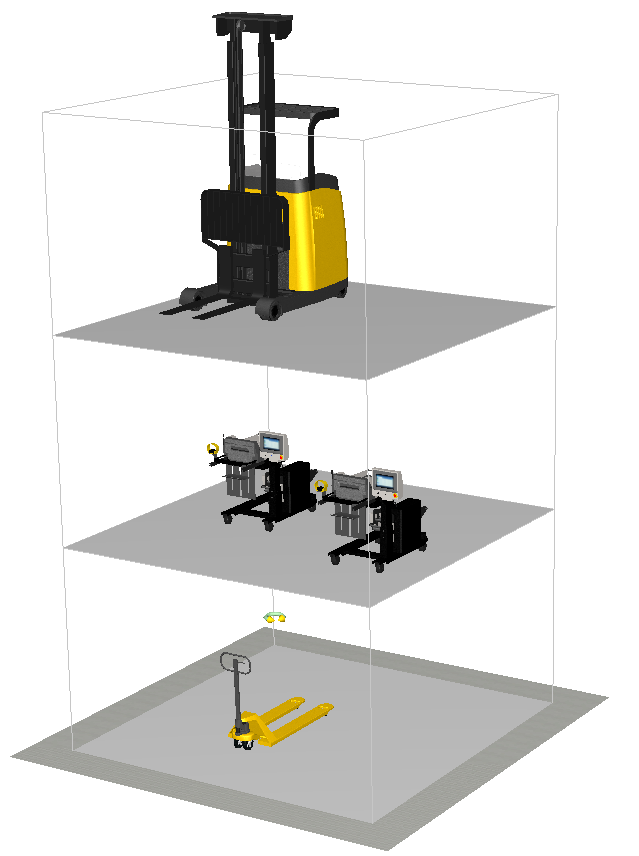
- Using your manufacturer extension, place any product snappers in a multi floor setting, preferably >3 extra levels. Ensure these product snappers still sit at correct elevation and works correctly when being repositioned, rotated, copy & pasted, toggled through different options in the Quick Properties.
Manufacturer Papers
Some internal development work has been done by the developers which also caused some code changes in the territory of paper view classes. Thus, unfavorable behaviors should not be introduced as a result of such.
Ensuring best experience possible in the spanking new CET 12.5 release, please run smoke test instructions of:
- Using your manufacturer extension, generate auto papers and verify the output through 'Print Preview' or a generated 'PDF'. Ensure the manufacturer logo, header and related information is still intact.
Elevation view
In the abstract of Material Handling, there are some changes done to the 'Elevation View' to accommodate the specific needs of Material Handling industry. However, the entire feature throughout different manufacturers and industries is still referenced to the generic 'Elevation View' in CET core.
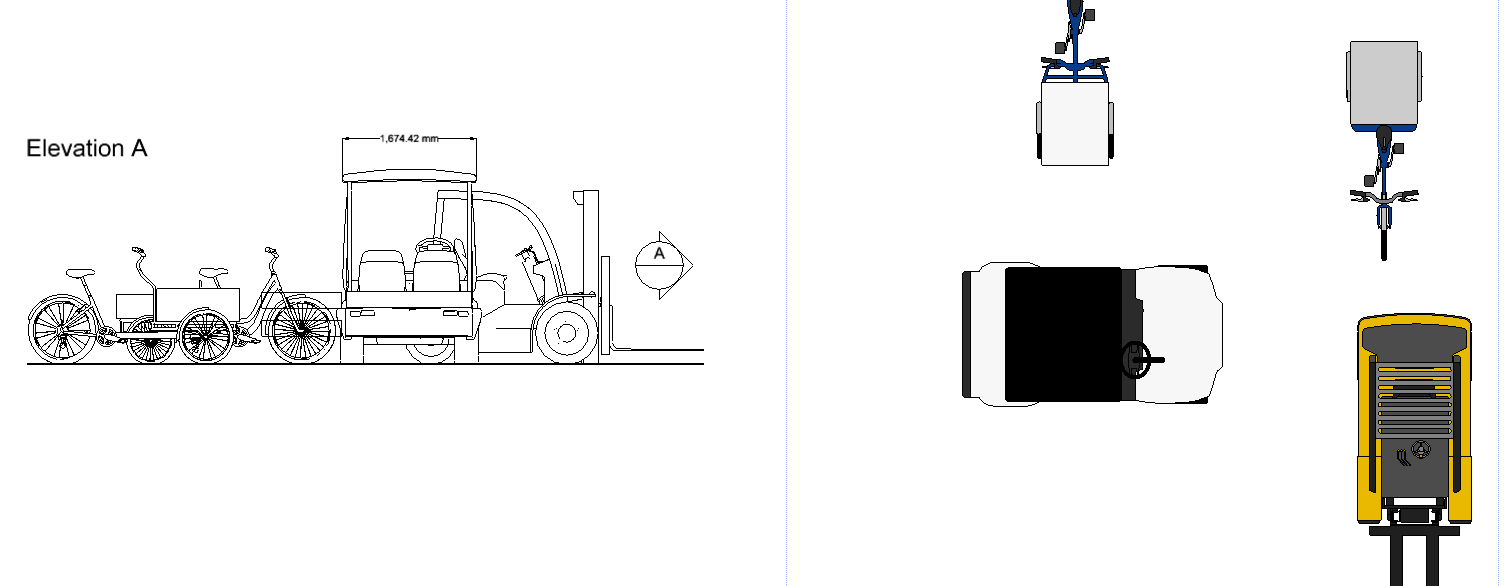
Therefore, we strongly recommend smoke test instructions in CET 12.5 of:
- In your manufacturer extension component tab, try out 'Elevation View' for different layouts of your manufacturer products. Verify in 2D space that the rendering has no anomalies. Going a mile further, verify accuracy by using dimension tools to ensure the measurements of the rendering is correct, in correspondence to the actual product snapper dimensions.
Configura SIF Export
This section has been introduced in the 12.0 QA Testing Guide. Making sure it works best for all of our partners, we highly recommend a re-run of below test instructions.
'Configura SIF' is introduced to replace ProjectMatrix SIF. It works for all manufacturers and allows extension and users to add format for specific manufacturer columns using 'Custom SIF'. For this round of CET 12.5, we recommend only testing with your manufacturer extension only by using 'Configura SIF' export format.
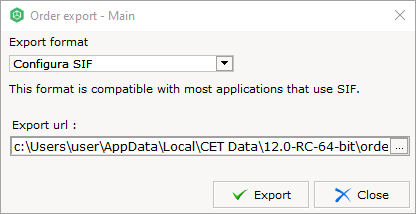
Using your extension, perform test instructions of:
- In your drawing, open up Bill of Material (BOM). Using a default/custom article view, perform an Order export of 'Configura SIF' format. Ensure the process does not crash and export is successful. Verify that changing the sorting order in BOM's column or sort manually, the order in exported SIF should be synchronized, also the correctness of information.
- You may also test by creating new categories and tags in 'Part Tagging' dialog,
for example: tag category (tag name) : TAG1 (TAG1_HERE), TAG2 (TAG2_HERE), TAG3 (TAG3_HERE) TAG4 (TAG4_HERE) , TAG5 (TAG5_HERE),
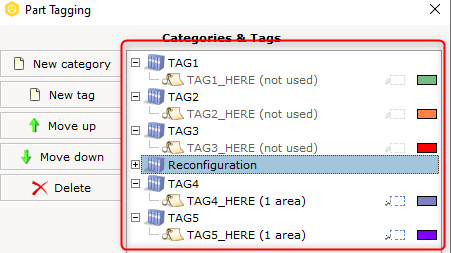
Have some of them applied in the drawing, in Bill of Material, verify that the expected TAG values are shown on the items, columns likely will need to be turned on. Export as 'Configura SIF' and verify the TAG values appear as they should.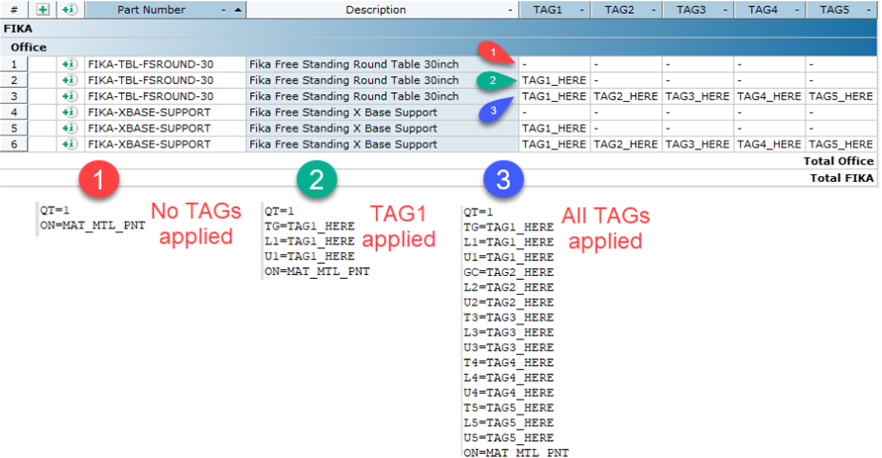
You may also refer to this article for more information on SIF Export: Exporting Article Views to SIF
New Features
PBR Material
PBR Material will make its full appearance in CET 12.5 as previously previewed in CET 12.0 minor release. To recap, PBR Material can bring higher quality renderings and exporting materials to different software will work much better. This feature will bring material realism a level above when working with CET 12.5 !
Converting materials to PBR in Material Lab
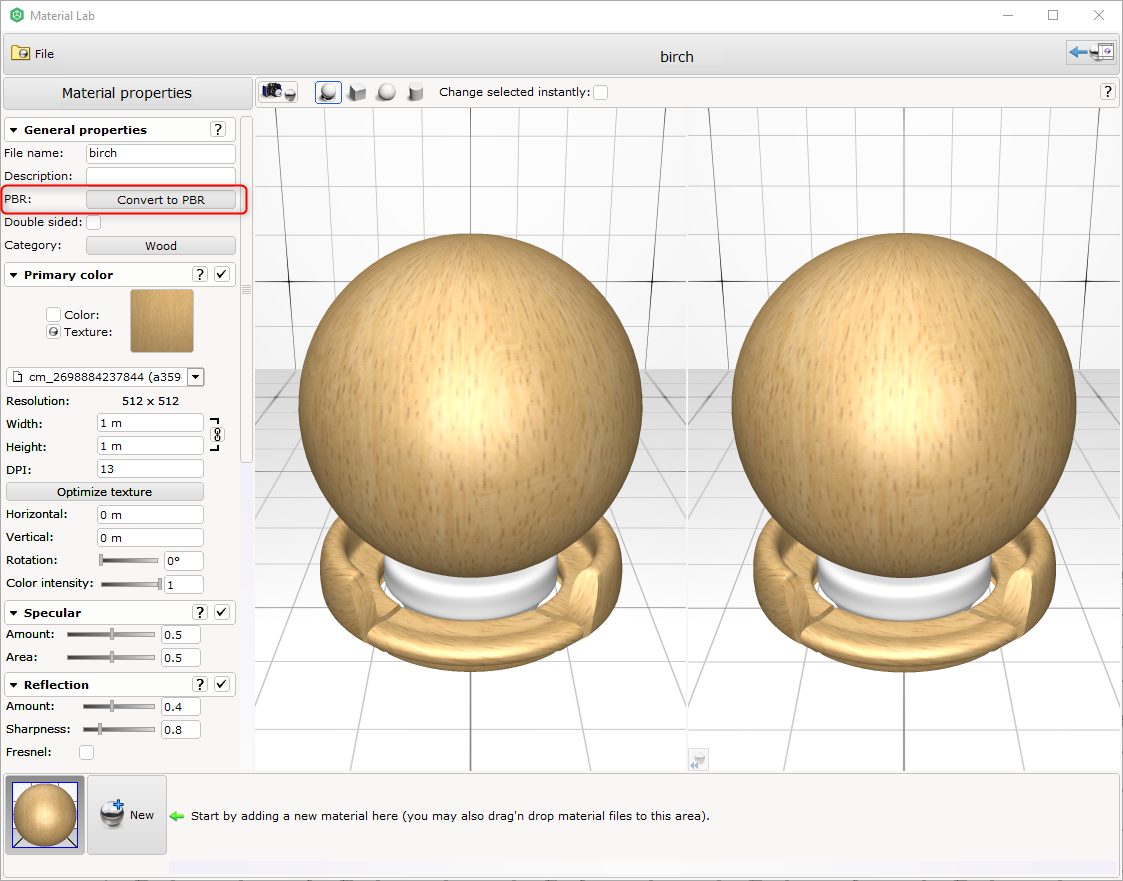
CET will now support 2 types of materials in material lab, the classic materials and PBR materials. A new button “Convert to PBR” is present to convert classic materials to PBR materials. PBR materials will be saved in *.gm files same as classic materials, however it will only open in CET version 12.0 Patch 3 and later. Classic materials can be bulk converted at once using the material batch converter tool.
Test Instructions:
- Open your non-PBR material in material lab.
- Click on “Convert to PBR” to convert non-PBR material to PBR material.
- Save the converted PBR material.
Converting materials to PBR through code
Do check with your developer to ensure if existing materials have been upgraded to PBR. Note that this is not a compulsory process, as CET 12.5 will still support loading non-PBR materials. For more information on PBR migration, refer to the 12.5 Developer migration guide here.
For users that have/don't have PBR materials, follow these test instructions to ensure CET 12.5 still work as intended:
- Using your extension snappers, try:
- Changing to different materials in the quick properties or scheme manager, make sure they look correct as before, watch out in 2D/3D, PBR should look acceptable if not better than before depending on your materials.
- Perform a rendering and ensure the materials still look as accurate, using converted PBR Materials.
- Save and Load new/existing drawings to make sure no unintended visual changes happen, ensure existing drawings previously created without PBR material, still can be loaded and worked on in CET. A new drawing with PBR material should support save/load as usual without unintended behaviors.
- Using your manufacturer papers, create product render printouts regardless of PBR/non-PBR materials and ensure they look good as before.
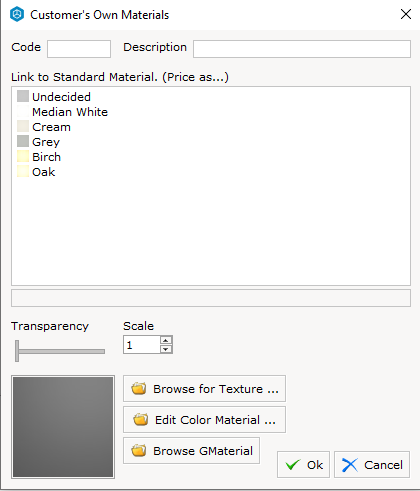
- Create 'Customer Own Materials'(COM) and ensure they still work, refer to photo below.
Note:
Converting non-PBR material to PBR material does not magically make it much better than before. There are parameters that need to be added to the PBR materials such as textures and channels.
Click me for the webinar recording link
Comments
0 comments
Please sign in to leave a comment.