
Getting the lighting just right for a rendering can be a tough job, right? Well it doesn't have to be! With Image Based Lighting, you can have lighting automatically generated based on the brightness and temperature of an HDR image that you set in the background of a rendering. Here's a great example of the light changing in two renderings of the exact same room just from changing the background image:
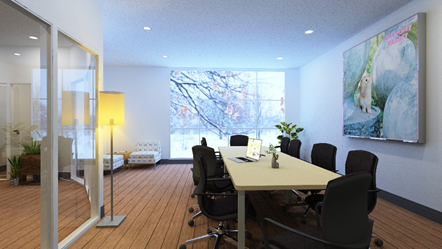
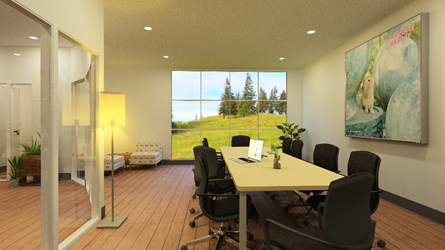
Nothing was changed about this scene - not the light sources, materials, anything - besides the background image in the Photo Lab - but the whole space has a different temperature and level of brightness emitted from the image in the window.
Sound too good to be true? Well it's not! It's super easy to use a background image from Simple mode in the Photograph Setup area:
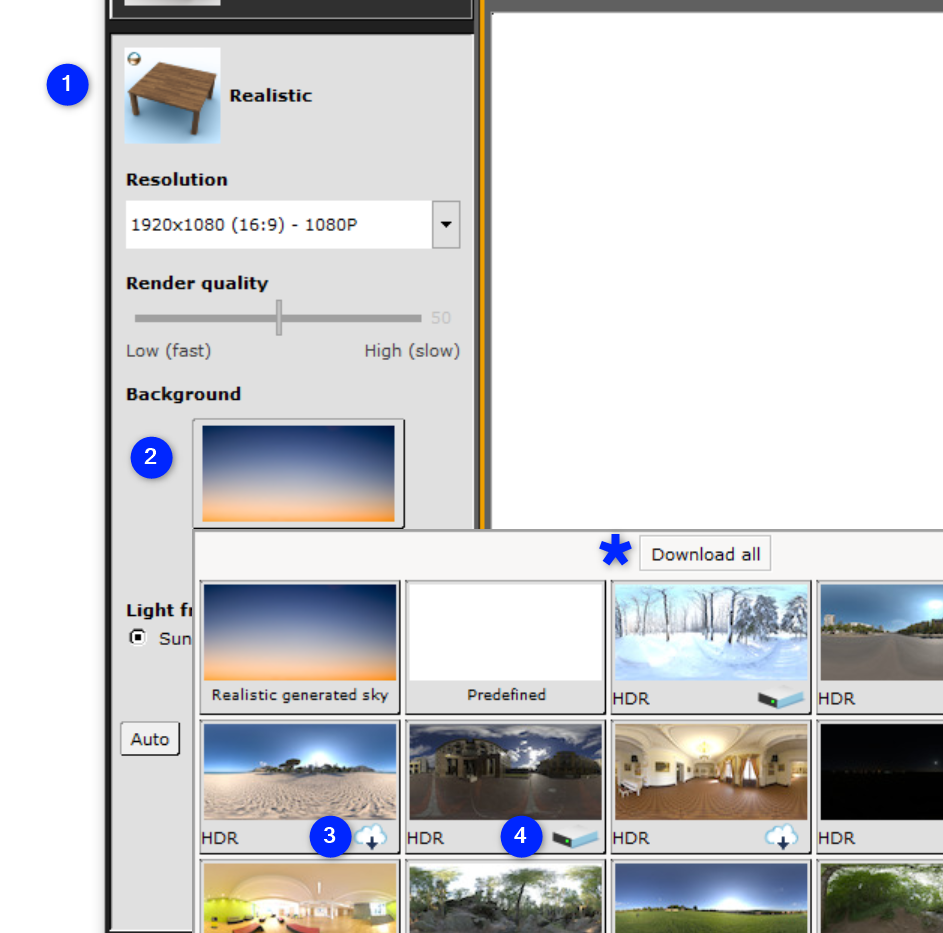
- To use Image Based Lighting, you must have the Realistic preset selected.
- Then under Background, click the preview of the current selection. This will expand a wide array of High Dynamic Range (HDR) images to select.
- Click on the image you want to use. By default, images are stored in the cloud, so when you click an image it will first need to download.
To have all the images available, click Download All at the top. Downloaded files will remain on your computer so you do not need to re-download them each time you open CET. - Once an image is downloaded, you will see the icon of a hard drive.
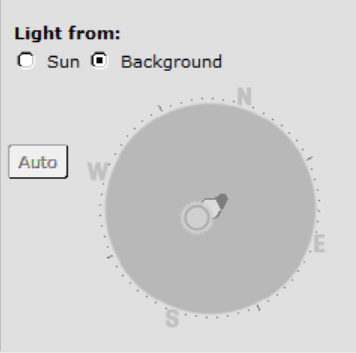
- Choose Background as the Light from: option. This will grey out the option to use the sundial because the light direction will be automatically set based on the image used for the background.
- Render!
As your photo renders, Photo Lab evaluates the image and determines the brightness, temperature, and other light characteristics that should be used to light the scene. So just sit back, relax, and wait to see your amazing renderings!
Comments
0 comments
Please sign in to leave a comment.